MxDrive

Contents
MxDrive is a separately-priced system of Transforms and hardware for testing ADAS.

These are the high-level steps to create an MxDrive test: 1.Create a Harness using MxTransIt. Use the Transforms listed below. 2.Define your Resources. 3.Create your TestCases. 4.Populate the TestCases. There is a sample project provided to demonstrate MxDrive capabilities. |
The MxDrive Simulator Transform accepts data, such as location and path,. It uses this data to simulate the movement and interaction of the vehicles and display the simulation in a graphical display. The current status of all vehicles in the simulation is transmitted from the Vehicle Data Out outport.
|


This Transform accepts messages on the Vehicle Data In port and extracts data for the specified vehicle only. The data is decoded and transmitted from the outports. Each Vehicle Data Decoder Transform corresponds to one vehicle.
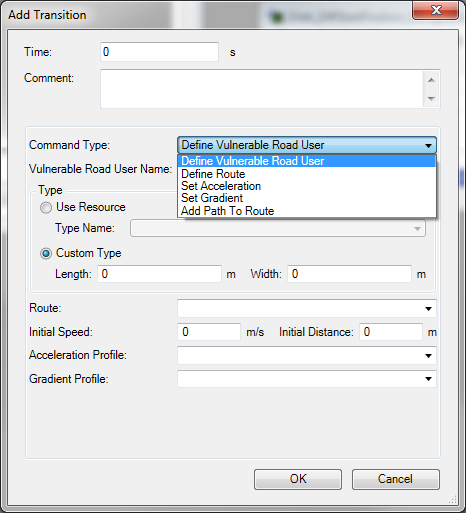
PropertiesUse the properties to specify which data to extract from the input messages. Filter Type. Select Filter by Name or Filter by Label. Vehicle Label. The Vehicle Label is defined in Start Simulation transitions. Vehicle Name. The Vehicle Name is defined in Define Vehicle transitions. When Filter by Name is selected, messages that contain this name are decoded. The Vehicle Id is also used in the names for the outports.
|


This Transform accepts a SAE J2735-defined Basic Safety Message and transmits its components on individual ports. ") BSM Decoder Transform (partial) |
This Transform accepts a SAE J2735-defined Emergency Vehicle Alert and transmits its components on individual ports. ") EVA Decoder Transform (partial)
|
|

|

|

This Transform accepts a SAE J2735-defined Traveler Information Message and transmits its components on individual ports. |
|

|

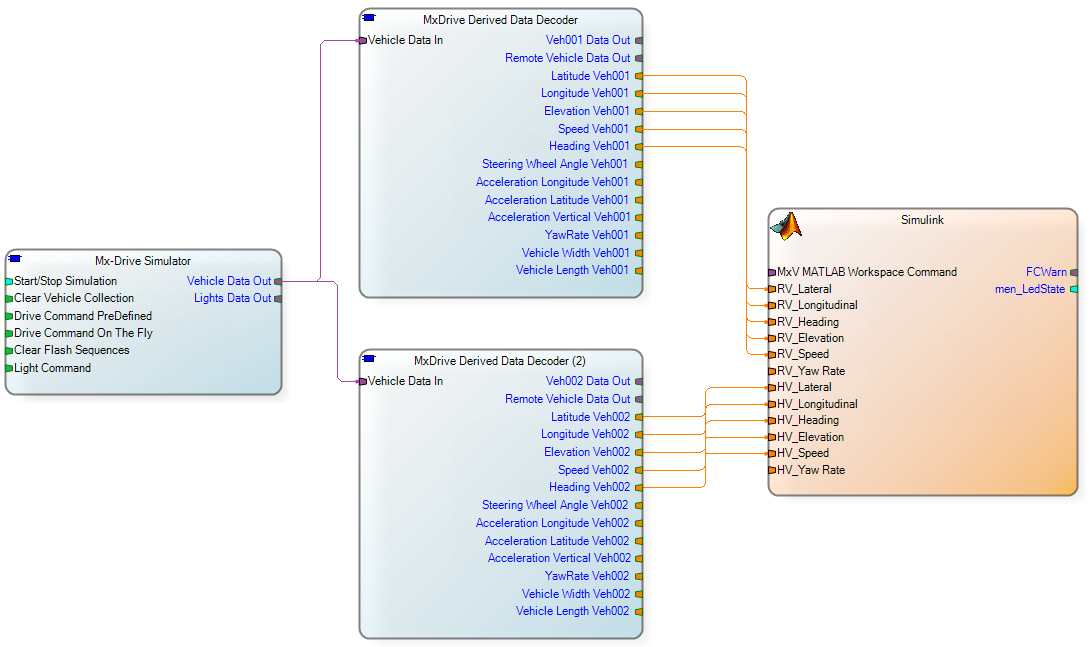
Sample Project
This is an example of a Test Harness in MxTransIt.
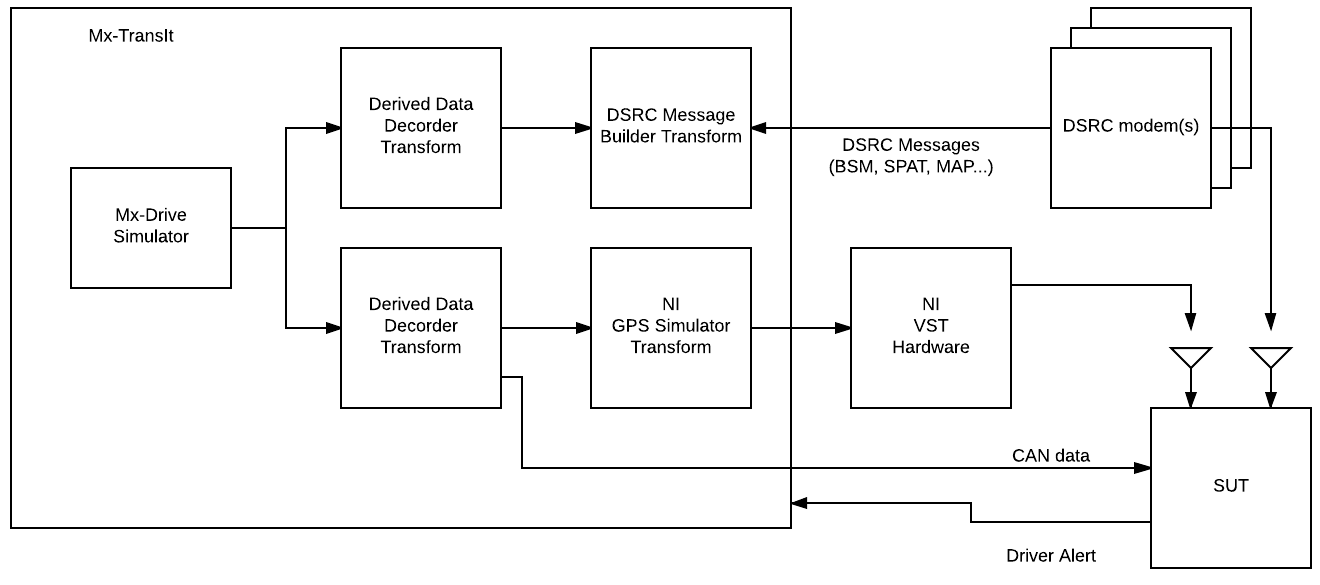
Sample System Diagram
This is an example using MxDrive for HIL testing.