Project Explorer

Contents
The Project Explorer window enables easy navigation of the main MxVDev objects and access to some of the frequent operations for the project.
If the Project Explorer is not visible, select View‑>Project Explorer from the MxVDev main menu:

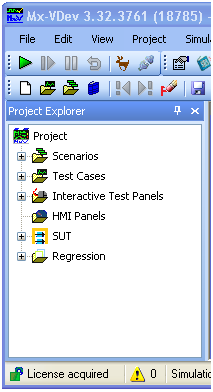
The Project Explorer panel is displayed as shown:
Note: If the Project Explorer is still not visible, see Troubleshooting.
It is initially displayed on the left-side of the screen in a pinned state. It can easily be unpinned (by clicking on the thumb-tack button), causing the window to auto-hide and auto-display, offering greater viewing area. You may also drag the window and dock it to any side of the window, if you prefer.
Tip: Use the unpinned mode when viewing complex diagrams for the project, to allow greater viewing area for the diagram and to minimize scrolling.
The items are displayed using a tree-view. Each can be expanded (or collapsed) by clicking on the '+' (or '-'). Most items have a default action when double-clicked (such as Open). Other actions are available by right-clicking the item.
Renaming a Scenario or Interactive Test Panel
To rename a Scenario or ITP, select it in the Project Explorer, right-click, and select Rename from the context menu. The Rename dialog is displayed:

You can change the File Name, the Internal Descriptive Name, or both. You can also use the Save As command to copy the Scenario or ITP with a new name.
Renaming a TestCase
To change a TestCase file name, its Internal Descriptive Name, or both:
1.Select the TestCase in the Project Explorer.
2.Right-click, and select Rename from the context menu.

3.Enter a new File Name and Internal Descriptive Name for the TestCase.
Note: For ease of use, we recommend the file name and internal name stay the same unless there is a good reason for them to differ.
4.To update the Scenarios that contain the TestCase, click the checkbox.
Moving a TestCase
To move a TestCase to another folder, select it and drag it to the new folder.
Note: Moving files with Windows File Explorer or any other tool outside MxVDev may break the internal links between TestCases and Scenarios.
Navigating using Project Explorer
Scenarios and TestCases
The Scenarios and TestCases items are linked to the folders that are defined on the Other Files tab of the Project Settings dialog. In most cases, it is best to use the default folder, ScenariosAndTestCases. You can add additional folders, which may be useful for sharing Scenarios and TestCases between projects.
Expanding either of these items shows the sub-folders that exist on the disk under this area. However, only the files that are Scenarios (.mxs) or TestCases (.mxc) are displayed.
SUT
Currently the SUT folder in the Project Explorer displays information only for legacy projects created with older releases. You can view the SUT files in the project folder.
Regression
This shows:
•The Regression tests (*.mxreg) that are defined for the project
•The Regression log files (*.mxrlg) that have been created (if any)
•The Regression report files (*.html)
You can run a regression test by double-clicking the Regression test. Each execution creates a new Regression log file.
You can view a Regression Report by double-clicking on the report file.
Comparing Regression Log Files
Regression log files can easily be compared using the following feature offered by MxVDev:
•Right-click the base log file and select Compare - Select Baseline Results.
•Right-click the log file to compare it with and select Compare - Select Subsequent Results.
A dialog is displayed showing the differences, if any. This is easy method to ensure the current results match a base regression test and, if not, to identify the differences quickly and easily.