Working with Scenarios

Contents
A Scenario is used to establish a set of TestCases and specify the sequence the TestCases execute. When a TestCase is added to a Scenario, it is called a Job.
Use a Scenario to define an execution sequence for Jobs. A Job has a reference to the TestCase to execute, and a couple of execution options. In the simpler cases, the Jobs are executed in sequence until the final Job is complete. You can also configure a Scenario to execute Jobs in parallel (concurrently). This is useful for creating stressful conditions by running independent tests in parallel.
Creating a Scenario
From the main menu, select File‑>New‑>Scenario. Alternatively, in the Project Explorer, right-click on the Scenario folder, and click New Scenario. Provide a meaningful name for the Scenario when prompted. From this point, follow the instructions for editing a Scenario below.
Editing Scenarios

The Scenario editor has four tabs. Each of these tabs is described below.
The Jobs tab summarizes Job information and displays the status of the Jobs as the Scenario executes. The fields displayed are: •ID: A unique numerical identifier associated with each Job. •TestCase Name: The internal name of the TestCase that is scheduled to run under this Job. Move the mouse over this field to display the path and file name. •Precondition(s): A list of one or more Jobs (Job IDs) that must be completed before the Job on the current row will start. Jobs that have the same preconditions start at the same time and execute concurrently. •Run Count: A count of how many times the TestCase will run under this Job. If the Run Count is set to Forever and the Stop Endless Jobs When all other jobs have ended property is set, the Job repeats until the end of the test. If the property is not set, the Job repeats until it is stopped. •State: As the Scenario schedules the Jobs, their state changes. The possible states are Ready, Running, Waiting, and Complete. •Pass/Fail: Indicates whether the TestCase passed or failed. The column remains blank until after the Pass/Fail algorithm has been run. •Start Time: The time the job started running, measured in seconds from the time the Scenario started running. •End Time: The time the job finished running, measured in seconds from the time the Scenario started running. To run a Scenario it must have at least one Job. You can add, edit, or remove Jobs using the buttons provided. Before a Job can be removed, ensure that it is not a precondition for any other Job. You can also: •Add Jobs by clicking on a TestCase in the Project Explorer and selecting Add to Scenario, or by dragging the TestCase from the Project Explorer onto the Scenario. In each case, the precondition is set to that the Job is added to the end of the sequence. •Remove a Job by right-clicking on it and selecting Remove Job. •Change preconditions using the Up and Down arrows and Sort Jobs button. You can sort the columns in the Job Summary table by clicking the column headers. Before the Up and Down arrows are enabled, use the Sort Jobs button to ensure that the Jobs are sorted in execution order. Moving a job up or down will change the order that the Jobs are displayed, and also automatically update the Preconditions of the affected Jobs. •A TestCase may be added more than once to the Scenario. Each Job has a unique ID. If using Accept Results, see Repeated TestCases.  TestCase Turn as Jobs 3 and 5 When you click Add or Edit, the Job Properties Dialog is displayed: If the Auto Add box is checked when the Job executes, any response Signals that change but are not already in the TestCase are automatically added. This is useful for two main reasons: •While designing a TestCase, it lets you know what other Signals are changing during a test so you can examine the change and make sure it is expected. •It is an easy way to check that all Signals that are not explicitly included in your TestCase do not change when the Scenario is run. In this case, you would leave Auto Add on, include all Signals that change (as the test executes) in your test, and do not include signals that do not change. In the future when the Scenario runs, if any Signal that was previously steady starts changing it will be automatically added to the TestCase and the test will fail. |


You can associate requirements with the Scenario. This way, when reviewing reports, you will know not only which TestCases and Scenarios pass and fail, but also which Requirements Pass and Fail. See Requirements Traceability. Note: To use this feature, at least one Requirements Source must be specified for the Project. Requirements Sources are specified using the Req Sources tab on the Project Settings dialog. To associate another source with the Scenario, select it from the drop-down list in the Source column. |
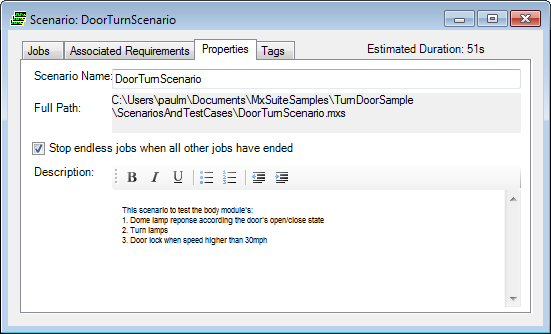
•Scenario Name: This is the Scenario internal name that was provided when the Scenario was created. You can use this property to change the internal name. To rename the file, use the Project Explorer. •Full Path: This shows the current location of the Scenario file. •Stop Endless Jobs When all other jobs have ended: When you build a Scenario you can set some Jobs to loop Forever, and others to run a finite number of times. It is often convenient to have the Scenario stop when all finite 'Run Count' TestCases are complete. Check this box if this is the case. This property is set by default. •Description: Provide a description. Scenarios can become complex, so provide a verbal description of the goal of the Scenario. |
This tab allows you to Tag the Scenario with keywords. These keywords are used to select a subset of Scenarios for Regression Testing. See the topic on Tagging to see how to take advantage of this feature. |
Related Topics:
Architectural Concepts - Scenarios